Showing posts with label thrifty. Show all posts

Saturday, 6 April 2013

Flower girl.


I went to my gorgeous cousin's wedding yesterday, and this is what  put together for the day. 100% thrifted. Shyeah.


~ Dress, Friends of Couture (thrifted), $7
~ Belt, thrifted, $2
~ Bag, thrifted, $8
~ Shoes, $2, thrifted
~ Lipstick Revlon "Rum raisin"


And here's some shots i took at the ceremony!


Congratulations guys!!


Annabelle


<3


xxx

Tuesday, 2 April 2013

DIY: Simple Bookbinding - Make Your Own Notebook! ( + my travel diary!)


So, I needed a travel diary. I adventure to Typo. I find a gorgeous little travel journal, I pick it up and skim through the pages. I smile. I turn it over and look at the price tag. I am appalled! I put it back out, and leave the store immediately.

There is nothing I like on Ebay.


There is nothing I fancy on Etsy.


Even Amazon fails me.


This left me with no other choice.....


I must make one myself.


And this is how I did it!


You're gonna need:


~ Something to use as a cover. I made this myself with a piece of cardboard I found and covered with vintage wallpaper that I already had. You can use a manila folder, old book covers, or you can do what I did and find a piece of cardboard and either leave it plain or cover it with fabric, paper, wallpaper or whatever you take a liking to.
~ Thread and a needle with an eye big enough to fit the thread through. (TIP: lick the end of the thread and squeeze it flat to fit it through the eye of the needle.
~ Something to use as an awl (which is a bookbinding tool). So basically, something strong and pointy to poke small holes with. Kay?
~ Paper
~ Scissors
~ A pencil.
 
Alrighty, so you got your stuff? Let's go!


Step 1


Decide on how many pages you want, and then half that number and fetch that many pieces of paper. I wanted 24 pages, so I got 12 pieces of paper. Put all these pieces together and fold evenly. You want the fold to be sure of itself, so grab a bone folder or a knife or ruler, and use the back of it to get that fold nice and...uh...folded. Not just curved.


Step 2


Put your paper flat on your open cover, and position it so the fold in your paper aligns with the fold in the cover. Grab your pencil and mark where the holes are going to go on the paper. I did mine about an inch apart all the way down. Hey look! I got a text message!


Step 3


Now it's time to poke some holes! Get your sharp pokey thing and make a hole in each dot.


Step 4


Place your pages on your cover like you did before. Making sure your pencil is sharp, put the point in each of the holes in the paper to mark where the holes will be on the cardboard. Clever, huh! You also want holes right at the edge of the paper on the cover as well, so mark there too, like I am in this picture. Then poke your holes like you did last time!


Step 5


Cut a length of thread, tie a knot at the end, and thread it through your needle (remember my tip from earlier in this post!)


Step 6


Now for the fun part, let's sew! Okay so, to start, poke your needle through the first hole at the top of the paper in the cover, and pull the thread through until your knot catches. Now, come back up through the next hole, and pull tight. Then go down through the next hole, and pull tight, and up through the next and so on until you reach the end like this:


Now, we do the same thing again but coming back up the other way. So, down through the next hole, pull tight, up through the next, pull tight.


Step 7


When you reach the end, make sure that everything is pulled tight and your pages are secure. Now we want to tie off our thread. To do this we take our needle down through the first hole where the knot is, and bring it back up through the next hole. Pull your thread through, tie it off with the tail of the knot at the hole with a good, strong triple knot. You can even dab a bit of glue on it to be extra sure. Then snip off the excess string and.....


 Voila!


You have a book!


Now, if you want a button and string clasp like I have on mine (see in picture at top of post), it's really easy! Thread your needle and tie a good strong knot like last time, and from the inside of your book, thread the string through the centre hole that you made and pull it through until the knot catches. Okay so that part's done. Now pick a button, and sew it on to the cover like in the image on the top of this post. and there you have it! A button and string clasp.


Now go use it!


I hope you found this tutorial helpful.


And before you wander off....

Check out our facebook page...and like it!!
And have a squizz at our Pinterest...and maybe even follow us!
We sell pretty things on our Etsy...
And our Twitter is lots of fun!


God Bless!


Annabelle


<3


xxx


Sunday, 24 March 2013

Wonderland.


There's nothing like a trip to the op shop with a couple of good friends.


If I were to go to Wonderland, this is what I would wear.
The shirt is thrifted, and was about $5
The dress once belonged to my oldest sister
The belt was thrifted for $2


Yes I do have other bags and shoes.....I just reeeeally like these ones!!
The shoes were thrifted for six bucks
The socks were a Christmas present
The bag was thrifted for three dollars.
 
 
Another cheap outfit! It just goes to show what you can do if you really have fun at an op shop.


Before you go...


And if you fancy a chat, an email: annabelle_1995@hotmail.com.au


Have a wonderful week!!


Annabelle


<3


xxx


Sunday, 10 March 2013

Business as Usual.

I had a poker night a couple of weeks ago, and I channelled my inner tough nut!

Also, look forward to Wednesday, we have a new category coming up! (Providing I have the energy to complete the post!!)


('scuse the poor camera quality once again!)


My shirt was $1 from the thrift store, it has beautiful sheer detailing in all the swirly bits, simply gawjuss!
The pants were a gift from my motherdear
The bag was thrifted for 3 bucks
I was wearing the normal shoes, and Revlon Midnight Affair on my fingernails

The jacket was a DIY from years ago...I tied up with elastic bands and chucked it in a bucket of Demesdos (which is a bleaching cleaning fluid)...it STUNK for ages....but it looks cool!!


Have a good one!


Annabelle


<3


xxx


Thursday, 7 March 2013

I'm BAAAAACK! + Little red shorts.

I have returned! And I have come baring a new weapon: a schedule.

I am, officially at least, going to be creating a new post each Friday, Monday and Wednesday. There may be a few surprises here and there, but this is just to get things in working order, and to give you pretties something to look forward to!

So, as a reward for your patience whilst I have been away resting myself, here is a pretty little number for you to enjoy:


Little Red Shorts:
(please excuse the quality of some of the pics, our SLR was flat at the time D: )


So I went on a little outing with my parents in out new car last week.
 
And I was a happy little chap in this outfit.
 
 
The shoes, as you know, are thrifted, and were about six big'uns.
The socks were a Chrissy present a couple of years ago, I do believe they come from CottonOn Body
The bag is thrifted, $3
And the sunnies were a big, fat, painful $10 from Dotti.
My shorts are thrifted, I think they were about five dollars from le Salvation Army
The shirt was thrfted from Vinnies YEARS ago and I cannot recall the price (sorry dears)
The belt is from Vinnies as well and was $2
And the bracelet (which is actually a necklace, sneaky, I know.) was my dear mother's.
The scar belonged to my older sister, once upon a time,
And the jacket.  That precious thing. That B-E-A-YOOOOtiful (kudos to you Bruce Almighty fans) little number...is vintage AND was $2 from a garage sale.
uaibwuiddugusioahioad;gqwuodbsdvhyfhaoishq. Amazing, I know.
My lippy is Revlon "Blushing Nude" mixed with a little red
And my nails are Revlon "Midnight Affair", a lovely blue that mummy got my for Christmas
 
 
I do believe that is all.


Cheerio, chaps!


Annabelle


<3


xxx


Monday, 11 February 2013

Budget Living - DIY and Learning Crafts.


I've always been a crafty person. No, not in the scheming deceitful way, but in the creative make-something-out-of-whatever-I-can, collection-of-toilet-paper-rolls type of way.

Crafting can save you  A LOT mulah, and if you get it right (which isn't as hard as you might think!) you will be a smiling loon at the end of the day when your masterpiece is ready for use. Depending on what you make, DIY doesn't have to take very long either, so if you use the excuse that you "don't have time," you are dead wrong! Nice try, slick.

And, to make things even more awesome, DIY is incredibly environmentally friendly if you do it in the right way. You can re-use almost anything and make it beautiful and use it yourself, gift it or even sell it and make money!

Craft can save you money in so many places! These include:
  • Storage, you can make beautiful storage containers out of old jars, decorated boxes or containers and even old wood and furniture, if you are so bold as to attempt some woodworking.
  • Gifts! Gifts are one of the best things to make yourself. The list is endless: jewellery, cookies, beanies, cushions, cake stands, skirts, make-up holders, and so on. The fact that you have put the time aside to make something for your friend makes it all the more special.
  • Pretty much anywhere, really. Almost everything you use daily you can make yourself: clothes (which I really hope you use regularly..), jewellery, bedding, laptop sleeves, notebooks, shampoo and conditioner, candles, curtains, scarves and so on, and on and on and on. In most cases when you make something yourself, especially things like shampoo, they are better for your health.

And if you want to get really thrifty, pretty much any supplies you need for craft can be found at any op shop! Save your more typical supplies like glue. Some of the things I regularly buy myself from the thrift store are wool (at about 50 cents a ball!), fabric, buttons, vintage wrapping papers (as craft paper),  jewellery to use for beads, jars, boxes, baskets, sewing patterns, ribbon, lace, the list goes on.

Your Kit:
If you want to get crafting, for simple projects such as clothes or perking up items, like this lamp that I did a few months back, you are going to need a simple kit. Most of these things you can pick up at either your local supermarket, op shop of craft store. So, you will need:
  • Two pairs of scissors. Fabric scissors and normal scissors. You do NOT want to use fabric scissors on paper, as you will blunt them and scream angrily every time you try to cut fabric with them for the rest of eternity.
  • Glue. Depending on what you want to do you will want different types, but for starters all you will need is PVA, and an all purpose glue (Uhu all purpose glue is great, and affordable), and a basic glue stick.
  • A needle
  • Pins
  • Cotton
  • Measuring tape and a ruler
  • A pen
  • A collection of fabrics, beads, rhinestones, trimmings, and whatever else takes your fancy!

If you're a busy person, I would recommend craft books, I have a few, mostly given to me by my boyfriend of his lovely mother (thanks guys!). If you don't want to spend your money on those, just spend five minutes here and there looking at tutorials on the internet and saving the ones that you like to a file in your favourites or on your computer for you to check out later when you need to make a gift or something. YouTube is AH-MAZING for tutorials.

There are so many things out there you can craft up. If you find a cupboard you like at a thrift store but the colour doesn't suit your décor, grab some sandpaper and paint and do it up! Make some pretty labels for jars and spray paint the lids to keep your flour, herbs, and sugar in. Cut up the clothes you don't like anymore for fabric, or make a dress in to a skirt.

Once you've got your basic crafty skills down-pat, start looking at more complex ones to learn and even specialise in! I've taught myself crochet, felting, drawing, painting, and sewing amongst other things, and I'm looking at learning cross stitch and embroidery when I'm well enough!

 Just a few of the things I have made for gifts and for myself include a crochet blanket, crochet collars, pendants, beanies, doilies, high-waisted shorts and skirts, flowers and heaps more.

All you need is a few tools and an open mind.

One thing I really recommend is when you really want something, anything, first ask yourself how much you want it and how much you actually need it.

Then sit down and think. Is it possible for me to make this thing, so I don't have to buy it? Do I have anything I can use instead?

If it's possible for you to make it, do it! Because you can make it your own, and it will save you money. If there is something you have that you can use instead, then: You. Don't. Need. It.

However if you desperately want it, and don't need it, but can make it yourself, knock yourself out! I didn't need these high-waisted shorts, but I sure wanted them! Nothing could keep me from making them, not even this chronic fatigue. And they cost me under three dollars! Under two, even.


So you see, craft is fun, and it is money saving. So why not?


Happy crafting!

Email me at annabelle_1995@hotmail.com.au if ye want any advice, if you have questions, or if you just want to chat!
Also, check out our Facebook page and like it, if you like! It will keep you updated and smiling.
http://www.facebook.com/pages/TeaSymphony/413282935422189


Love love love love love!


Annabelle.

<3


xxx


Wednesday, 6 February 2013

A Budget Wardrobe.

 
Believe it or not, I once despised op shops. Yep. Let us pause for a moment and let this sink in.

Brace yourself, because here comes another shocker: I wanted to be "scene"....you know, rainbow hair, piercings, black, black and more black. (I have nothing against you who enjoy this style, I commend you!) It's just not me though, is it?

So you can imagine you would never, EVER  have caught me dead in op shop. So consequently, my bank account suffered. My savings for my car were virtually extinct. My parents wallets would run for cover when I walked in to the room. And to top it all off, I was dead tired from having to keep a job and, as I remember putting it once, my life "sucked."

So somewhere along the line I had an epiphany. HALLELUJAH!

I realized I needed to look at my money and plan for my future, and that I needed to grow up and look after myself. I think the fact that I found out I was allergic to gluten and dairy and taking them out of my diet completely changed the chemistry in my body and cleared my head may have had a part in all this.  A HUGE part. So I downsized the way I spent, and I re-ignited my love for vintage.

And sweetie, I never looked back!


 Give thrift stores a chance.

I used to think thrift stores were yucky and smelly. Granted, some of them are. But they are so much more!
You can get virtually anything for any style there. Really current style dresses, shirts, skirts and shoes, vintage clothes, cowboy boots, stiletto heels, chunky necklaces, dainty chains....the list goes on.
I find a lot of people think thrift stores only have grotty old clothes or "old lady" clothes for "indies and hipsters." These days, most thrift stores will trash anything torn up or sell them as rags, or even cut them up and sell the good parts as fabric. So chances are if you toddle in to a thrift store and explore the racks, you will find any number of modern, vintage or on trend clothing pieces in really good nick. If you take a look at my Styling section, you'll see! Most of my wardrobe is thrifted these days.
So you have to get past the idea that thrift stores are pointless! You can find anything you're looking for, if you just take the moment to look.
And a really cool thing about thrifting? By shopping at an op shop you are both recycling, so it's sustainable, and you are giving money to a good cause!
 
You also want to keep an open mind and think cleverly.

I found this in the "old lady" section.
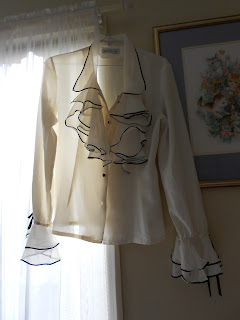
 Can't find a pair of shorts you like? Rummage through the pants and jeans racks and you might find something you can cut and hem in to the perfect (stand out) shorts for you! The same goes for dresses, you can cut and hem to the desired length, or even get some nice complimentary fabric from the craft section and add some length if it's too short! You can cut sleeves, add sleeves, use belts, add sashes, turn dresses in to shirts or skirts, wear shirts as jackets, change buttons, add patches and accents....the options are endless if you just think. I promise, you will come up with some great, original clothing pieces. Pretty much anything you would want to add to a piece of clothing you will find in a thrift store.
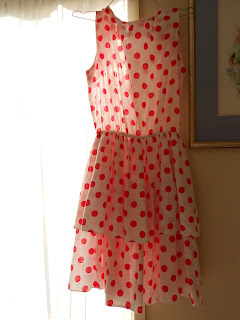
Be adventurous! The white polka dot dress pictured here was found in the costume section!


If you're on a really tight budget or just want more for less,  pay attention to the sales.


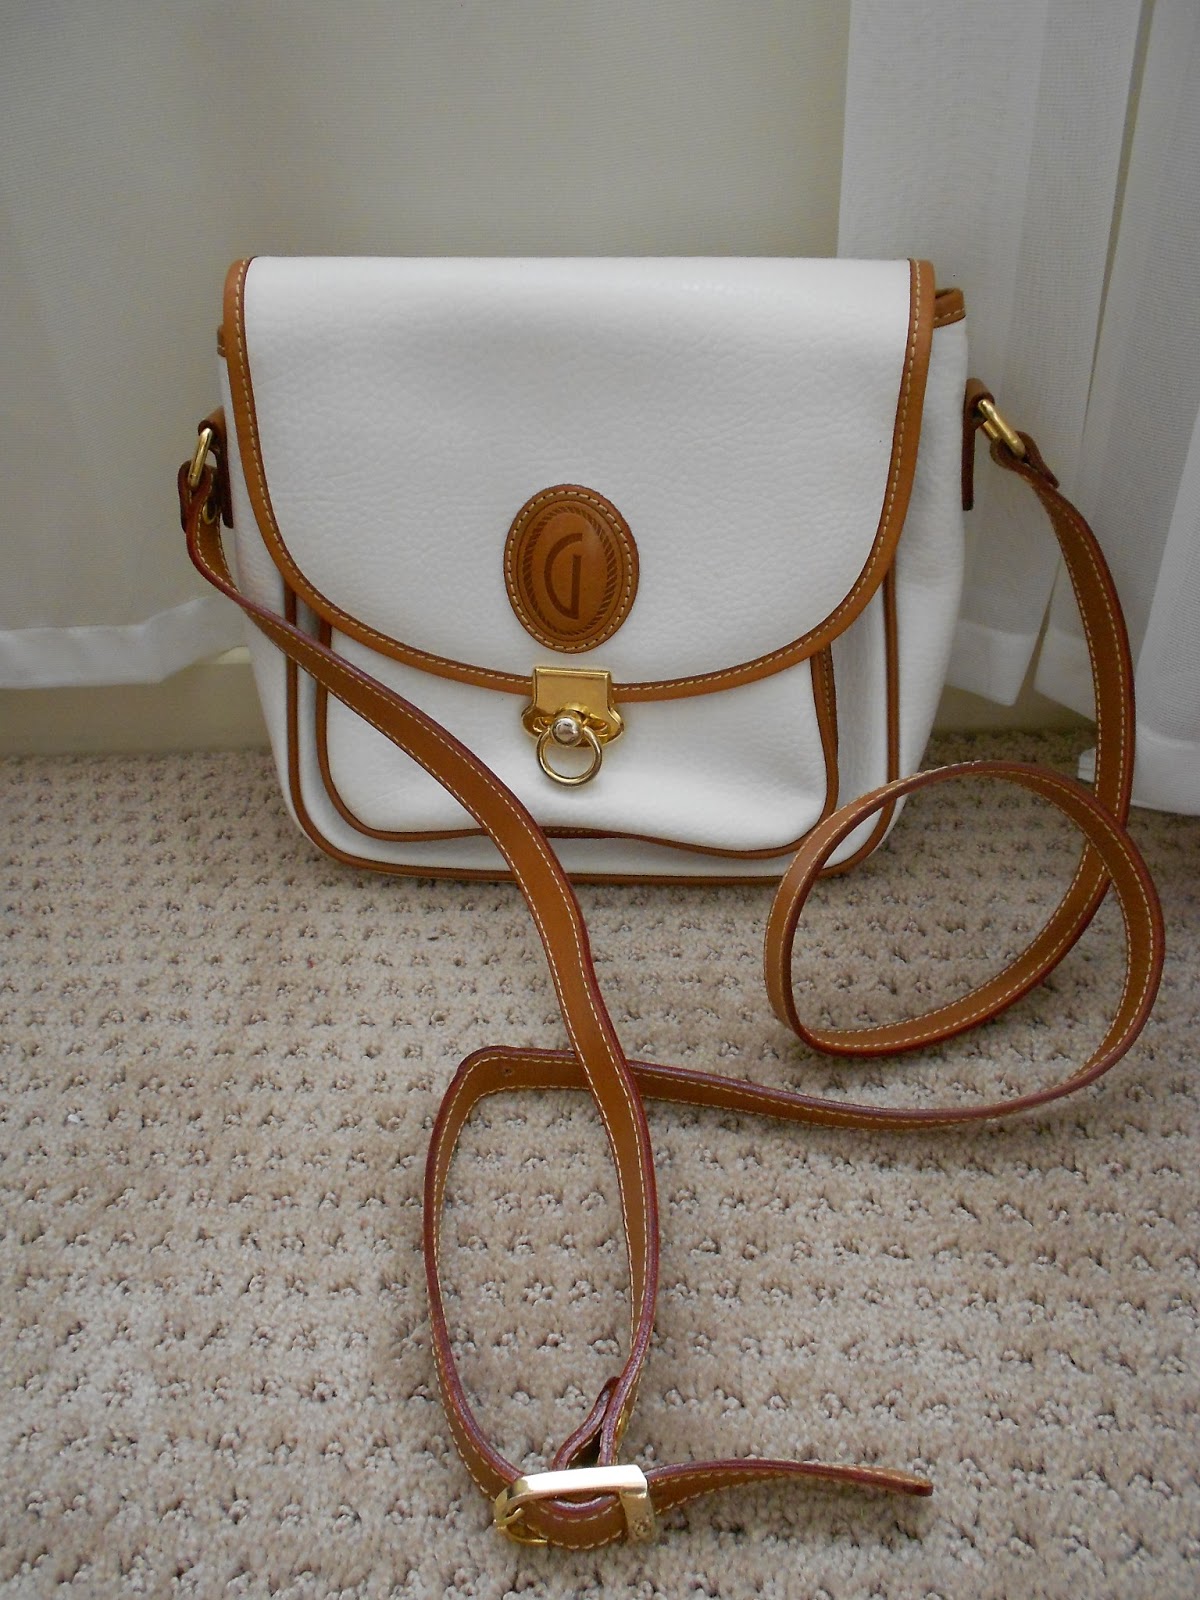
I personally get a massive kick out of a good bargain, I would probably include "professional bargain hunter" on my resume if I could. So I pay attention to the sales for the fun of it. Salvation army stores  have sales each week according to the colour of the tags. So when you walk in, look for a poster or massive cardboard cut out saying which coloured tag is 50% off that day! I'm so hopeless, I will ONLY buy what's on sale unless it's already seriously cheap. I have been known to walk in to an op shop and look at a five dollar top, fall in love with it, and leave because it is "too expensive." Vinnies stores and most other thrift stores will have a $1 rack absolutely bursting with cool stuff. The grey top above was found on a one dollar rack! Also, the more obscure thrift stores like church or house ones tend to be much cheaper, and you are more likely to find gems there, because they haven't been picked over and items aren't prices according to their worth! These shoes were two dollars, and the bad was three!


Finally, and I can't stress this enough, so I shall put it in bold for your eyes to soak up:

Know you aren't restricted to only thrift stores.

Other places I will happily bag a bargain include garage sales, markets, and sales at QUALITY stores. I will not pay $60 for a dress unless it is from a store like Myers, and it is reduced from a very high price. I got this one for sixty dollars down from almost three hundred, and the quality is amazing:

 
And THIS was $2 from a garage sale


Remember, if you are thrifting, look for quality in  clothes if you don't want to have to keep replacing them. Even if they are only a dollar, you don't want to keep wasting your money by replacing bad quality items. Those dollar could go in to your savings and earn interest, or buy you another amazing piece of clothing!
 
                                        Some earrings from a garage sale and an op shop!


I hope that this helped you, feel free to email me if you have any enquiries at annabelle_1995@hotmail.com.au.
 
I guarantee you that this method of shopping will save you money, and you will end up with so many unique and one-of-a-kind-pieces.
 
Stay tuned for more budgeting fun!! (wow, now that sounds like an oxymoron!) Subscribe to receive an email each time I post something new! There is a link on the right panel of this page.
 
Happy shopping, my lovelies!!
 
 
Annabelle.
 
 
<3
 
xxx

Monday, 4 February 2013

New Series!.... "Living on a Budget!"

Budget. The very word makes you feel bored, yes? Well, no, not really. It can be fun! And if you do it right, you can get quite a kick out of it. I promise you I'm not lying.

For me a budget is unavoidable. I've never had the health to hold a job, and now that I've gone and got chronic fatigue (clever me!) I have no hope of a real job for a while! But it will happen, and when it does, I will still enforce budgeting because, honestly, I love it! And I'm skilled at bagging a bargain (not to toot my own horn ;) ).

Whether you can't have a job like me, don't have the time because of school, are in a tight situation or just want to save money, this series will be a help! Even if you don't like my ideas, I promise you it will make you smile and give you a few light bulbs of your own!

In this series there will be a few things that you will read about, like:

  • Wardrobe and clothing
  • Outings on a budget
  • DIY and learning crafts
  • Crafts on a budget
  • Décor on a budget ( I will use my bedroom as an example)
  • Saving your dollars!
  • Food on a budget, and
  • Above all, how to go about all these things in the most sustainable and fun way possible!
So I hope you enjoy, and I hope I can help you!!!


Annabelle.

<3

xxx

Friday, 1 February 2013

DIY: Thrifted coat - Boring to unique...

I've been looking at this coat for a while. I thrifted it a while back and have barely worn it because it was nothing special...it just wasn't "me" enough! Well, one night as I was trying to sleep, I had a lightbulb moment.
And now I bring this moment to you!
In this tutorial you will be shown how to add trimming to the cuffs, bottom and pockets of your jacket, but you can add whatever to any part of the jacket you like!

What you will need:

~ A jacket or coat, or whatever you feel obliged to pretty up
~ Pins (and a pincushion, a cupcake one will make the experience more joyful)
~ Scissors
~ Measuring tape
~ Fabric of your choice (as much as you think  you need! Depending on how much of the coat/jacket you desire to cover)
~ Sewing machine
~ A needle and cotton!


STEP 1 (cuffs)


Measure the length around the cuffs of your coat. Write it down (unless you trust your brain wholeheartedly), and add a 1cm seam allowance on each end (so, 2cm in total, ;) )


STEP 2

Work out how thick you want the trimming on your sleeves. I wanted mine relatively thin so I decided on 3cm. Add a 1cm seam allowance on each side, so I cut 5cm.


STEP 3


Cut two lengths of the necessary length and width. Unless you're an octopus. Then cut eight.


STEP 4

Fold in your seam allowances and pin the strips  to the cuff! I found it easiest to fold in the ends and one side of the strip and hand sew (yes, hand sew. Good luck sewing around a cuff on my bulky sewing machine!)  the folded side, and then  fold the next side in. It saves all the pins getting in your way! Sew, sew, sew!


STEP 5 (bottom)

Spread out your coat/jacket on the floor and take out your measuring tape. Spread out your arms like you're telling mummy how much you love her and measure the total length!
Then figure out how thick you want this trimming. I chose 5cm. Then add a 1cm seam allowance all the way round (you do the math here, my brain hurts) and cut yourself a nice long strip like this one!

 
Pin it on the bottom of the coat in the same manner you did the cuffs. (I forgots to take a picture, but you catch my drift (I hope!!))
Then sew!


STEP 6 (pockets!!)

 
This bit is a little bit difficult. If you were lucky unlike me, and have square pockets, cut a square with a 1cm seam allowance  and hand sew it on. Easy, right? Well, I wasn't so lucky. I got weird pockets.
 
Okay so,  measure your pocket width. Then, add a 1cm seam allowance (surprise!!!). Cut a sort of  quarter-circle shape. Then, place it face down on the fabric and cut around it. You should get something like this:


Pin it on to your coat. This is a  bit fiddly, getting it in the right shape, folding in the seam allowance and then pinning it. I believe in you. You can do it!
 
 
Now you are on the home stretch. Grab your needle and thread and sew all the way round! Careful not to sew up your pocket along the way.
 
 
Aaaaaaaaaaaaaaaaaaaaaaaaaaaaaaaaaaaaaaaaaaaaand......


You're done!
 
 
TADA!


Now, go look pretty!
 
 
<3
 
 
xxx